Pink Lady Cake

Pink Lady Cake

Wednesday, September 28, 2011

Irish Soda Bread and Risotto al Barolo


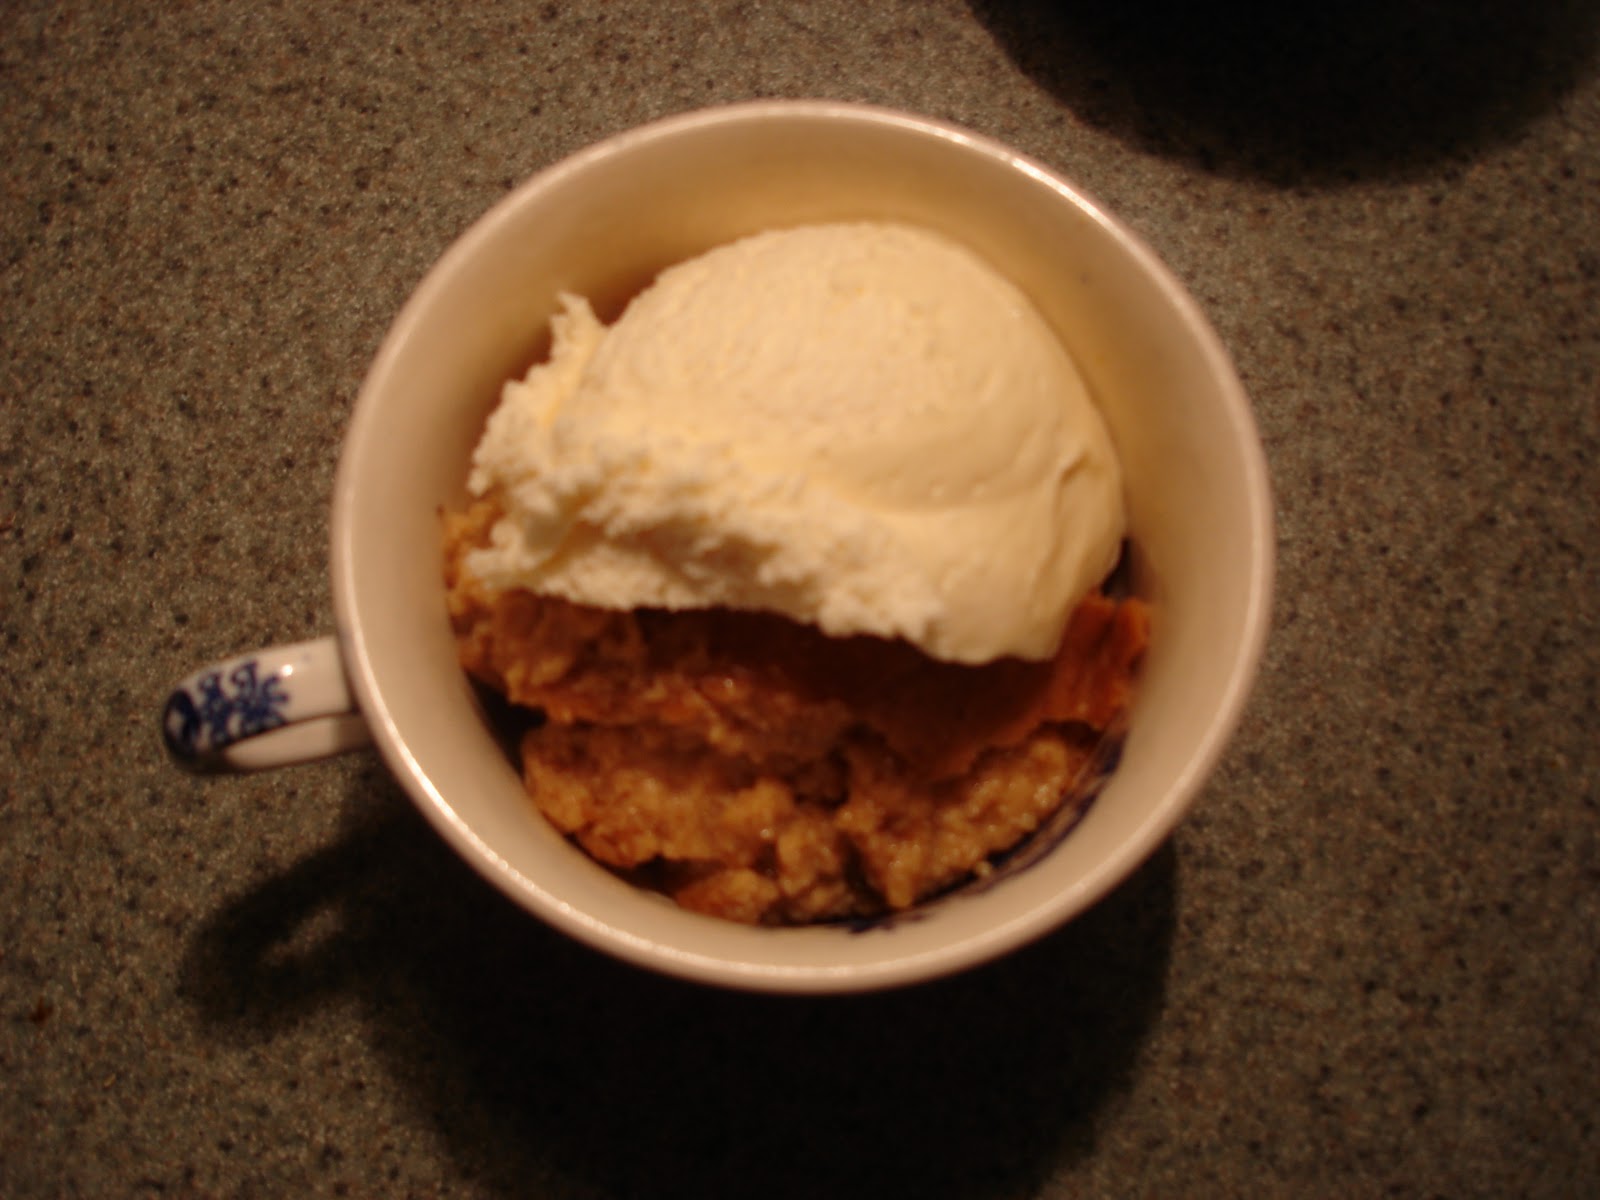
Today was a day with absolutely no homework.  It was quite odd, actually.  I got to go about leisurely, doing whatever I wished the entire afternoon.  This of course included cooking a few things.  Now for dinner tonight my mom told me that we would probably be having pancakes because there was next to nothing in the house.  I couldn't stand for this, knowing we had risotto rice and a recipe I needed to try out.  So instead of pancakes we had risotto with red wine. 

I was originally just going to make lemon risotto again, thinking we had a lemon.  It turned out that we didn't though, as my brother had decided just the day before that he should make, "a tiny bit of fresh lemonade."  I'm not quite sure he understood that one lemon doesn't even equal a tiny bit of lemonade.  Oh well, I got to try something new.  And it was pretty good.  There is a whole cup of wine, but the risotto isn't really overpowered.  I toasted the rice for a very long time in order for the grains to keep from becoming mush nad I think that helped, as the liquid to rice ratio is higher than in most recipes I have seen.

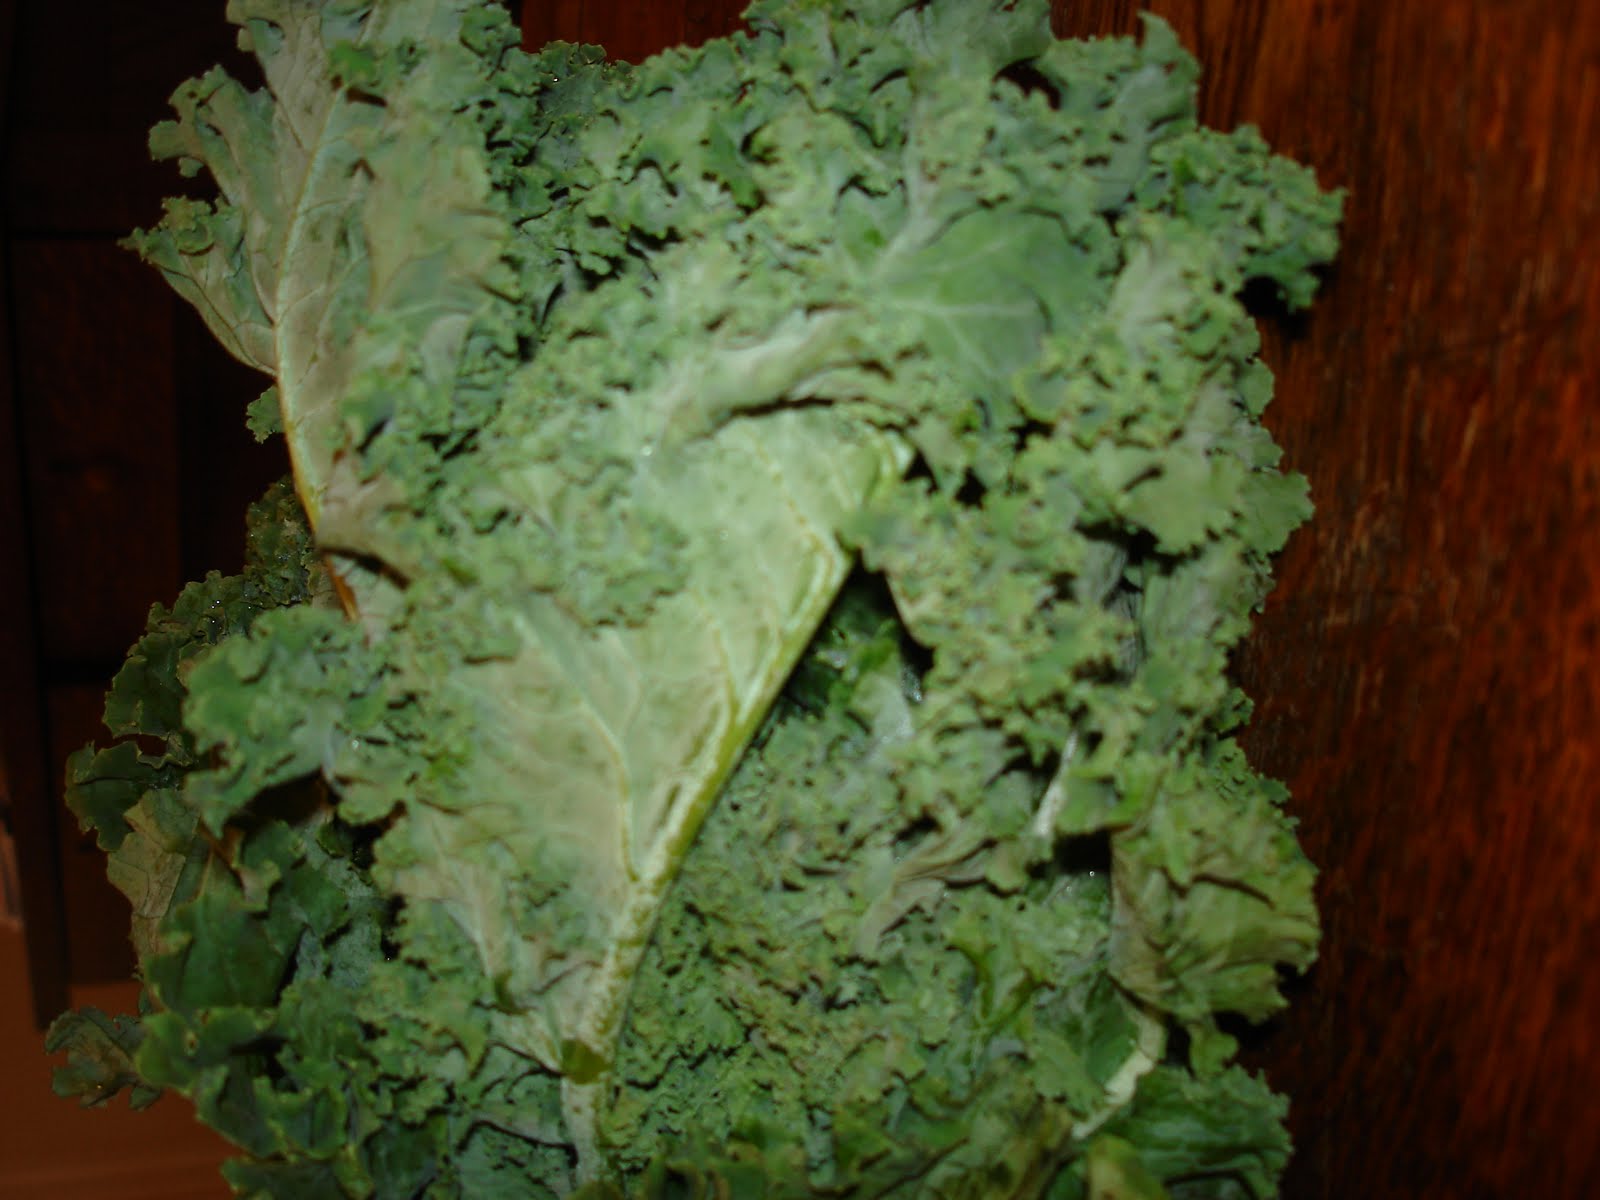
The other thing I made today was Irish Soda Bread, from Joy of Cooking.  While at the Common Ground Fair last weekend I picked up some honey that tastes divine and really needed bread that I could eat with it.  This bread is very good, like a lightly sweetened giant scone with tons of raisins.  It would be different had I added the caraway seeds, but my mom absolutely loathes caraway, anise and all of those licorice like flavors.  Thus, no caraway, but I could tell as I ate it that it would be a good addition.  It is a very quick bread to make as it has no yeast and no need for rising.  I would suggest that you keep the sugar at 2 tablespoons, as the raisins make it sweet enough.  

The last thing I need to mention is how my mom's birthday is coming up, which means I am able to make a cake.  I would just like to say that I am planning two cakes, one for Saturday night and one for Sunday afternoon, both of which I will post.  The Sunday afternoon one is much more grand and spectactular than the Saturday night one, even though it it one of Julia Child's.  On Suday I plan to make the Biscuit Joconde Emprime-Entremet from the January Daring Bakers Challenge.  It is, in essence, a sponge cake wrapped around a variety of fillings, such as mousses, curds, cheesecakes, meringue, ect.  It stands entirely on its own like a trifle outside of a bowl.  Needless to say, this will be an experience.

Risotto al Barolo
Smitten Kitchen Adapted this from Mario Batali

Yield: 6 to 8 first-course servings.

1/4 cup extra virgin olive oil
1 medium onion, finely diced
1 1/2 cups arborio rice
1 cup Barolo or other dry red wine
6 cups chicken stock, preferably homemade, or low-sodium, canned
3 tablespoons cold, unsalted butter, cut into small pieces
1/3 cup freshly grated Parmesan cheese, more for serving.

1. In a wide, deep skillet, heat oil until very hot but not smoking. Add onion and cook, stirring, until softened and translucent, 8 to 10 minutes. Do not brown; reduce heat as needed. Add rice and stir with a wooden spoon until opaque and slightly toasted.
2. Meanwhile, heat the stock in a saucepan and keep it just below a simmer. Add wine and a ladleful of hot stock and cook, stirring often, until liquid is absorbed. Continue stirring and adding hot stock a ladleful at a time, always waiting until liquid is almost completely absorbed before adding more. Cook until rice is tender and creamy but not mushy, about 20 minutes. Toward the end of cooking time, rice will quickly soften, so stir constantly and taste often. Turn off heat and stir in butter. Stir in cheese and serve with additional Parmesan.


Irish Soda Bread
Joy of Cooking 75th Anniversary Addition

One 8-Inch Round Loaf or 8 1/2 by 4 1/2-inch loaf

When the batter is made with the greater amount of sugar and buttermilk and baked in a loaf pan, it becomes a fine crusty bread that stays moist for 3 to 4 days.

Preheat the oven to 375 degrees Farenheit, 350 if you are baking in a loaf pan.  Grease a large baking sheet or an 8 1/2 by 4 1/2-inch loaf pan.

Whisk together thoroughly in a large bowl:
1 2/3 cup all-purpose flour
2 tablespoons sugar, or 5 tablespoons for the tea loaf
1 teaspoon baking powder
1/2 teaspoon baking soda
1/2 teaspoon salt

Stir in:
1 cup raisins
(2 teaspoons caraway seeds)

Whisk together in another bowl:
1 large egg
2/3 cup butter milk (or 2 teaspoons vinegar and 2/3 cup milk), or 1 cup for the tea loaf
1/4 cup ( 1/2 stick) butter, melted and still warm

Add to the flour mixture and stir until just the ingredients are moistened.  The batter will be stiff but sticky.  Scrape the batter onto the baking sheet in a mound 6 to 7 inches in diameter, or scrape it into the loaf pan and spread evenly.  Use a sharp knife to slash a large X about 1/2 inch deep on top of batter. 
Bake until golden brown and a toothpick inserted in the center comes out clean, 25 to 30 minutes on the baking sheet, 45 to 50 minutes in the loaf pan.  Transfer the round loaf to a rack to cool completely before serving.  Or, if using a loaf pan, let cool in the pan on a rack for 5 to 10 minutes before unmolding to cool completely on the rack.


Tuesday, September 27, 2011

Daring Bakers-Croissants


Finally that day has come, for my first Daring Bakers post on my blog.  I made the croissants for this post on the 17th, but no one was allowed to post until the 27th.  So, I waited.  This was incredibly difficult, mind you.


Now I can actually talk about them.  Well, if you have never made croisants before, they take about 12 hours from start to finish; 13 if you are me, and are inherently slow.  But I, even knowing this already still wanted to try out making gluten-free croissants.  I used the recipe for gluten-free croissants that had been used on someone else's blog, and, well the results were quite poor.  Was it because of the flours you used, was it too hot?  You may ask these, but it was in fact something that you wouldn't think would be the main problem in gluten-free baking, it was the butter.  Normally, croissants are a basic bread dough folded around a stick or so of butter.  This means that for 12 croissants there would be less than a tablespoon butter for each croissant.  Now the gluten-free recipe was suspicious from the beginning.  It called for a stick of butter in the dough along with cream cheese and cottage cheese, in addition to the stick of butter rolled in.  I made them anyways, and that didn't work too well because, yes, actually, it was way too hot for croissants.  But the second batch kind of worked.  Now, I had to try them, even if they looked quite strange, and upon the first bite knew why you should never put so much butter in a croissant.  It was like eating plain butter, and even though I like butter, this was actually too much.

Because I am on the topic of croissants, I feel the need to provide you with the story of the last time I made them.  I feel a little bad mentioning it, not wanting to deter you, but to remind you that something that seems the smallest can have the biggest impact.  So, this Spring I made croissants for my English class because I read "My Life in France."  I had to make them on a Sunday that way they would be fresh, and I also had to make 24 instead of 12; a double batch.  This took a very long time, 16 hours, actually, and I ended up burning a few of them at the very end.  It was merely because we had left something on the vent which built up smoke inside the oven.  All that time I had been afraid they wouldn't rise and that turned out not to be the problem at all.  Yet all wasn't lost because I was able to rescue most of them.  So, my warning is not to become lax towards the end because you are so tired of croissants and end up wasting all of your days work.


Anyways, so I gave up on gluten-free croissants.  That will be a challenge for another day.  I turned my energies back to gluten croissants which I had made before.  They actually turned out wonderfully.  Though I had thought of all these wonderful things to bake into them, such as honey and lobster (not together, mind you) I never got around to them.  The croissants do not end up very big, as the recipe makes 12, yet they will still be nice and flakey on the outside and moist and spidery within.  I believe you can make the croissants bigger, because I think some of the pictures people posted for Daring Bakers were done making larger croissants from the same dough amount.  Anyways, I encourage you to make croissants.  There is very little manual labor, just a lot of waiting around until you have to make the next turn of the dough.  The recipe, as printed on the Daring Kitchen site is below:


Preparation time: In total, 12 hours.
Making dough, 10 mins
First rise, 3 hours
Kneading and folding, 5 mins
Second rise, 1.5 hours (or overnight in the fridge)
Rolling in the butter (turns one and two), 15 mins
First rest, 2 hours
Turns three and four, 10 mins
Second rest, 2 hours (or overnight in the fridge)
Forming croissants, 30 mins
Final rise, 1 hour (or longer in the fridge)
Baking, 15 mins
Equipment required:
• Measuring cups
• Measuring spoons
• Mixing bowls of numerous sizes
• Rubber spatula
• Plastic bag
• Pastry scraper
• Counter space or board for rolling and kneading
• Rolling pin
• Plastic wrap
• Baking tray

Croissants

From Julia Child's Mastering the Art of French Cooking Volume 2Servings: 12 croissants

Ingredients
¼ oz (7 gm) of fresh yeast, or 1¼ teaspoon (6¼ ml/4 gm) of dry-active yeast (about ½ sachet)
3 tablespoons (45 ml) warm water (less than 100°F/38°C)
1 teaspoon (5 ml/4½ gm) sugar
1 3/4 cups (225 gm/½ lb) of strong plain flour (I used Polish all-purpose flour, which is 13% protein)
2 teaspoons (10 ml/9 gm) sugar
1½ teaspoon (7½ ml/9 gm) salt
½ cup (120 ml/¼ pint) milk (I am not sure if the fat content matters. I used 2%)
2 tablespoons (30 ml) tasteless oil (I used generic vegetable oil)
½ cup (120 ml/1 stick/115 gm/¼ lb) chilled, unsalted butter (In Mastering, Julia actually says you can use up to 1 3/4 stick, but it is more difficult to work with)
1 egg, for egg wash
Directions:
1. Mix the yeast, warm water, and first teaspoon of sugar in a small bowl. Leave aside for the yeast and sugar to dissolve and the yeast to foam up a little.
2. Measure out the other ingredients
3. Heat the milk until tepid (either in the microwave or a saucepan), and dissolve in the salt and remaining sugar
4. Place the flour in a large bowl.
5. Add the oil, yeast mixture, and milk mixture to the flour
6. Mix all the ingredients together using the rubber spatula, just until all the flour is incorporated
7. Turn the dough out onto a floured surface, and let it rest a minute while you wash out the bowl
8. Knead the dough eight to ten times only. The best way is as Julia Child does it in the video (see below). It’s a little difficult to explain, but essentially involves smacking the dough on the counter (lots of fun if you are mad at someone) and removing it from the counter using the pastry scraper.
9. Place the dough back in the bowl, and place the bowl in the plastic bag
10. Leave the bowl at approximately 75°F/24°C for three hours, or until the dough has tripled in size. 11. After the dough has tripled in size, remove it gently from the bowl, pulling it away from the sides of the bowl with your fingertips.
12. Place the dough on a lightly floured board or countertop, and use your hands to press it out into a rectangle about 8 by 12 inches (20cm by 30cm).
13. Fold the dough rectangle in three, like a letter (fold the top third down, and then the bottom third up) 14. Place the dough letter back in the bowl, and the bowl back in the plastic bag.
15. Leave the dough to rise for another 1.5 hours, or until it has doubled in size. This second rise can be done overnight in the fridge
16. Place the double-risen dough onto a plate and cover tightly with plastic wrap. Place the plate in the fridge while you prepare the butter.
17. Once the dough has doubled, it’s time to incorporate the butter
18. Place the block of chilled butter on a chopping board.
19. Using the rolling pin, beat the butter down a little, till it is quite flat.
20. Use the heel of your hand to continue to spread the butter until it is smooth. You want the butter to stay cool, but spread easily.
21. Remove the dough from the fridge and place it on a lightly floured board or counter. Let it rest for a minute or two.
22. Spread the dough using your hands into a rectangle about 14 by 8 inches (35 cm by 20 cm).
23. Remove the butter from the board, and place it on the top half of the dough rectangle
24. Spread the butter all across the top two-thirds of the dough rectangle, but keep it ¼ inch (6 mm) across from all the edges.
25. Fold the top third of the dough down, and the bottom third of the dough up.
26. Turn the dough package 90 degrees, so that the top flap is to your right (like a book).
27. Roll out the dough package (gently, so you don’t push the butter out of the dough) until it is again about 14 by 8 inches (35 cm by 20 cm).
28. Again, fold the top third down and the bottom third up.
29. Wrap the dough package in plastic wrap, and place it in the fridge for 2 hours.
30. After two hours have passed, take the dough out of the fridge and place it again on the lightly floured board or counter.
31. Tap the dough with the rolling pin, to deflate it a little
32. Let the dough rest for 8 to 10 minutes
33. Roll the dough package out till it is 14 by 8 inches (35 cm by 20 cm).
34. Fold in three, as before
35. Turn 90 degrees, and roll out again to 14 by 8 inches (35 cm by 20 cm).
36. Fold in three for the last time, wrap in plastic, and return the dough package to the fridge for two more hours (or overnight, with something heavy on top to stop it from rising)
37. It’s now time to cut the dough and shape the croissants
38. First, lightly butter your baking sheet so that it is ready
39. Take the dough out of the fridge and let it rest for ten minutes on the lightly floured board or counter
40. Roll the dough out into a 20 by 5 inch rectangle (51 cm by 12½ cm).
41. Cut the dough into two rectangles (each 10 by 5 inches (25½ cm by 12½ cm))
42. Place one of the rectangles in the fridge, to keep the butter cold
43. Roll the second rectangle out until it is 15 by 5 inches (38 cm by 12½ cm).
44. Cut the rectangle into three squares (each 5 by 5 inches (12½ cm by 12½ cm))
45. Place two of the squares in the fridge
46. The remaining square may have shrunk up a little bit in the meantime. Roll it out again till it is nearly square
47. Cut the square diagonally into two triangles.
48. Stretch the triangle out a little, so it is not a right-angle triangle, but more of an isosceles.
49. Starting at the wide end, roll the triangle up towards the point, and curve into a crescent shape.
50. Place the unbaked croissant on the baking sheet
51. Repeat the process with the remaining squares of dough, creating 12 croissants in total.
52. Leave the tray of croissants, covered lightly with plastic wrap, to rise for 1 hour
53. Preheat the oven to very hot 475°F/240°C/gas mark 9.
54. Mix the egg with a teaspoon of water
55. Spread the egg wash across the tops of the croissants.
56. Put the croissants in the oven for 12 to 15 minutes, until the tops are browned nicely
57. Take the croissants out of the oven, and place them on a rack to cool for 10 minutes before serving.

Saturday, September 24, 2011

Indian Pudding


Today we went to the Common Ground Fair in Unity.  I realized while there that though I have always liked the idea behind the Common Ground Fair, I don't even really like fairs to begin with, of any type.  For this reason, the Common Ground Fair isn't terribly exciting.  Despite the fact that their food is definitely better than normal fair food, and the things being sold are all high quality, I don't really want to spend a day shopping.  And food that's just decent, isn't really what I want.  There was one exception, of course, the falafel was pretty wonderful. 


Now, while I was there, someone told me I ought to try the Indian Pudding.  Well, I didn't quite make it to wherever they were selling it, and went away from the fair without having had some.  Upon returning home I realized that I could very easily make Indian pudding and might as well just make it here.  Yet I was apprehensive; my first experience with it hadn't yielded superb results.

When I was at my grandparent's house during the winter we decided to make Indian Pudding.  Having never had it before, I was quite excited to try it, as it sounded splendid.  It was a recipe that took 3 hours and many cups of milk, and when it was finally done, the pudding was very watery and not terribly sweet.  In other words, it was very disapointing, as I had had such high expectations.


Yet since then, I have seen Indian Pudding that is nice and thick and looks wonderful.  I have been wanting to try and make it right since then.  Just yesterday, when coming back from Isleboro, my mom bought an Indian Pudding milkshake that was wonderful.  That, along with my experience today told me I just had to make it.  We even had ice cream ready and waiting.

This recipe is very good.  You may want to increase the spices or molasses and decrease the sugar depending on your preferences.  It is very thick and goes great with ice cream.  Just as well, it doesn't take the three hours to bake like some recipes do. 


Indian Pudding
Joy of Cooking 75th Anniversary Addition
6 to 8 servings

A truly warming dessert, with a taste and texture somewhat like pumpkin pie.

Preheat the oven to 325 degrees.  Generously butter a heavy 1 1/2 -to 2-quart baking dish.
Measure into a large heavy saucepan:

2/3 cup cornmeal

Stir in, very gradually at first to prevent lumps:

4 cups whole milk

Stirring constantly, bring to a boil over medium-high heat.  Reduce heat to low and simmer, stirring frequently, until thick, about 5 minutes.  Remove from heat and whisk in:

1/3 cup sugar (I used light brown)
1/4 cup molasses
2 large eggs
2 tablespoons unsalted butter, cut into pieces
1 teaspoon ground cinnamon
1/2 teaspoon ground ginger
1/8 teaspoon grated or ground nutmeg
1 teaspoon vanilla
1/8 teaspoon salt

Turn the pudding into the prepared dish.  Bake in a water bath until the center looks firm but still slightly quivery when the dish is shaken, about 1 hour10 minutes.  A dark crust will form on top.  Serve warm or cold with:

Vanilla ice cream or cream

Thursday, September 22, 2011

Madeleines!!


Finally got around to making madeleines today.  Yet, of course, I was impatient and didn't want to try and convert David Lebovitz's recipe from an amount making 24 to that making 16 because that is the amount my pan holds.  Just as well, I didn't want to have to chill the batter for at least an hour.  So, I ended up using the recipe that came with the pan.  They are quite good, very light and not too sugary.  I didn't add any vanilla extract because I didn't have any, and so instead added the zest of a small lemon, as David Lebovitz and many other recipes call for.  I suppose, personally I would prefer to have madeleines that are more like pound cake rather than sponge, but these still have promise.


Anyways, more Daring work this weekend, but instead for Daring Cook's.  The recipe we were given has many variations, and I'm hoping that between now and the 14th I will be able to try out a few. 

So today I went swimming again; not really wanting to, because the lines on the bottom of the pool, aren't all that interesting, but because I had to.  I really cannot justify making madeleines if I don't do any exercise.  Afterwards, I went driving for 45 minutes or so because I have spent next to no time at all on my night time hours.  I must say that it is quite scary, and I am afraid I may have hit a frog or two.  In other words, I may be sticking to driving during the day for a while.

That's that.  Here is the recipe for madeleines that I used.  Do follow the instructions that say to let them sit for a little while.  They taste a bit eggy when they are still hot. 


Madeleines
Adpated from a recipe adapted from Williams-Sonoma Foods of the World Series, Paris, by Marlena Spieler

Makes 16

Melted butter for brushing molds
1/2 cup all-purpose flour, sifted, plus more for dusting
2 eggs
1/3 cup granulated sugar
Grated zest of a small lemon
1/2 teaspoon vanilla
4 tablespoons salted butter, melted and cooled
Confectioners sugar for dusting or David Lebovitz's lemon glaze recipe

Preheat oven to 375 degrees.  Using a pastry brush, brush butter over each mold of the madeleine pan, carefully buttering each ridge.  Dust the molds with flour, tilting the pan to coat the surfaces evenly.  Turn the pan upside down and gently tap out the excess flour.

In a large bowl, combine the eggs and granulated sugar.  Using a wire whisk or handheld mixer on medium-high speed, beat vigorously until pale, thick nad fluffy, about 5 minutes.  Beat in the lemon zest and vanilla.  Sprinkle the sifted flour over the egg mixture and stir or beat on low speed until incorporated.

Using a rubber spatula, gently fold in half of the melted butter until just blended, then fold in the remaining butter. 

Divide the batter evenly among the prepared molds, using a heaping 1 tablespoon batter for each mold.  Bake the madeleines until the tops spring back when lightly touched, 8 to 12 minutes.

Remove the pan from the oven and invert it over a wire rack, then rap the pan on the rack to release the madeleines.  If any should stick, use your fingers to loosen the edges, being careful not to touch the hot pan, and invert and rap again.

Let madeleines cool on the rack for 10 minutes.  Using a fine-mesh sieve, dust the tops with confectioners sugar and serve. 


Wednesday, September 21, 2011

Stuffed Squash and My Madeleine Pan


Well today I finally found time to do something that wasn't homework.  It was wonderful.  I eased in just enough to sautee a few onions, dice some apple, and grate some cheese.  That was just about it, but it was still wonderful.  And, for that matter, I am able to actually blog today, not just cook.


So today I made stuffed acorn squash.  Thing is, I was going to use the recipe that my mom recommended from Jane Brody's cookbook, yet when we went to look for it, we found out that the one page missing from the cookbook held that recipe.  We searched online and eventually gave up; willing to go by memory and hope for the best. 


All in all, the results were decent.  I would have made some additions but my mom was adamant on having specific ingredients.  Of course, we were supposed to use cottage cheese, we realized after.  We really needed a better binding.  Also, the squash seemed too dry after having cooked twice.  I do so wish we had found that recipe.  Well, it is what it is. 

The other thing that happened today was that my madeleine pan from Williams-Sonoma arrived in the mail.  It is positively beautiful.  I am already in love with it. Tomorrow a recipe that is actually credible is promised.  I am thinking maybe David Lebovitz's recipe will be the one I use.  I would try and find Julia Child's yet I read recently that her dessert recipes are often too sweet and outdated.  I cannot remember if the article was based on Mastering the Art of French Cooking, which is what I have, or not.  If in fact it is I would like to remind the author that it was not Julia who developed most of the dessert recipes, but her co-author Simone Beck, so he or she shouldn't talk about Julia's bad recipes when Julia didn't create them.  The recipe for squash is below:


2 acorn squash, cooked until tender
2 granny smith apples, diced fine
3/4 cup sharp cheddar cheese
1/2 cup peanuts
1 medium onion, chopped

Suatee onion on medium heat for 7 or 8 minutes.  Add apple and sautee 3 minutes or so.  Remove from heat and add peanuts and cheddar.  Scoop into squash.  Cook 20 minutes or so, or until the filling is brown.  Adjusting recipe for more moisture in squash is recommended.

Saturday, September 17, 2011

Marginal Muffins


As I am working on my Daring Bakers challenge for my second weekend in a row, I really don't have much to give you otherwise by way of recipes.  The only thing I have is this pumpkin applesauce muffin recipe from the Oprah Magazine Cookbook.  It's decent, but personally it has a couple of unforgivable flaws, and really, I think pumpkin muffins taste the exact same.

To begin with, this recipe specified to have you cook them 20-25 minutes.  Now, mine were already more done than I would like (and of course I like mine kind of underdone) at 16 minutes, which is fully done for everyone else.  Maybe this is because I used gluten-free flour which means you must undercook, but this seemed like more than normal. So, that's one thing.  The other is that these kind of taste a little like apples, but mostly just like a  weak version of pumpkin muffins.  In other words, I have a much better recipe from somewhere else.  The last thing, which I kind of anticipated, is that this recipe states that it makes 12 muffins.  Guess what?  It makes closer to 3 times that amount.  Or maybe two times, I made a bunch of miniature muffins for lunches and am not quite sure of the conversion from miniature to normal size.
So those are all of the problems.  The other thing I would like to note are the results of my wild mushroom soup, where I used good wild mushrooms and entirely fresh herbs.  Turns out it was actually better the first time with baby bellas.   If you decide to make this, just use baby bellas like I did or something cheaper.  Do not bother spending money on chanterelles and shiitake mushrooms like we did.  Of course, they do look very pretty:


That's all for now.  I cannot wait until I can tell you about the results of my Daring Baker's Challenge on the 27th!  It's looking promising!

I won't bother giving you the recipe for the muffins. When I make my better recipe for pumpkin muffins I'll post that one.

Wednesday, September 14, 2011

Roasted Wild Mushroom Soup


Finally working my way towards the weekend again and realizing I have next to nothing to write in terms of my school day.  I suppose I should mention that this weekend I am going to go at it again and try the Daring Baker's Challenge a second time, just with gluten flour instead of gluten-free, which I am sure with be a huge improvement. 


Anyways, today I made a recipe from this morning's newspaper.  A recipe that is adapted from the book, "Notes from a Maine Kitchen" by Kathy Gunst.  The recipe worked out very well even though all we had were baby bella mushrooms, which don't have much taste and a lot of water.  I think it helped a little that I increased the roasting time to 30 minutes, as that seemed to take care of excess water and bring on the characteristic fond.  I think that I am going to make the recipe again tomorrow with different mushrooms.  Maybe shiitake?  If we can't find other mushrooms I will see if adding some tomato paste might help to boost the taste through carmelization.  Who knows, we'll see how that works out tomorrow.


Oh, and on a different note entirely, the cat below is a cat who has taken to visiting our house every day for over a month now.  He actually belongs to our neighbors, but they have multiple cats, so we believe he comes over for attention.  The neighbors refer to him as Moose, though I probably wouldn't have chosen that name...


The last thing I would like to note would be my thankfulness to a friend who gave us some beautiful, fresh thyme and rosemary from her garden.  It was wonderful to be able to use it in the soup and gave the dish a nice, clear flavor.  I would like to note that I decreased the amount of liquid in the soup from 5 cups to 4 cups, and used 1/4 pound more mushrooms than stated in the recipe.  This was because I felt that there would be too little mushroom flavor if I used bland mushrooms with such a large quantity of water.  Lastly, when I processed the soup, I didn't fully blend it at I wanted it to retain some textural conrast.  That of course, is your own choice.  The recipe is below:


Roasted Wild Mushroom Soup
Adapted by the Bangor Daily News from "Notes from a Maine Kitchen" by Kathy Gunst

1 pound fresh portabella, shiitake, Cepe or any wild mushroom you can find
2 teaspoons olive oil
3 medium onions, peeled and chopped
3 cloves garlic, peeled and chopped
Salt and pepper to taste
1 teaspoon chopped fresh thyme
1 tablespoon chopped fresh rosemary
2 tablespoons dry sherry or red wine
5 cups vegetable, chicken, or beef stock
A touch of heavy cream, creme fraiche or yogurt, optional

Preheat oven to 400 degrees.  Gently clean mushrooms using a moist paper towel.  Cut the bottom half inch off the stems and then cut the mushrooms into chunks.  Grease the bottom of a medium to large roasting pan or oven-proof skillet with 1 teaspoon of the oil.  Add the mushrooms, onions, garlic, salt, pepper, thyme, rosemary and remaining oil and stir well.

Roast on the middle oven shelf for 20-25 minutes, stirring once or twice, or until the vegetables are tender.  remove the roasting pan from the oven and pour the sherry or wine into the pan, scraping up any bits clinging to the bottom.  Add the stock.  Let cool a minute or two.

Transfer the soup to a blender or food processor and, working in small batches, puree the mushroom mixture and all the juices.  Blend until smooth,

Transfer to medium-large pot and season to taste.  Reheat and add a touch of cream, creme fraiche or plain yogurt.  Serve hot with crusty bread.

Monday, September 12, 2011

Fresh Dill Bread


I was beginning to question myself yesterday about whether or not I would be able to keep up this blog.  I knew I would be getting an essay the next day in English, I knew I would have to start flute lessons soon, I knew I would have to continue swimming, play tennis, do other homework.  Yet I also realized that this is what I want to be doing most of all, and I would have to keep this up for just that reason.  Really, I would much rather be kneading bread than solving complex problems.  So, I know I shall most definitely be keeping this up, if only to keep me cooking when I would otherwise not bother due to lack of time.


Well today I returned home to learn that chicken soup was being made for dinner, so that was out of the running for my blog post.  I couldn't possibly post a simple chicken soup, it is most definitely beneath me...No, don't worry that's not it at all, I love chicken soup, but I just wanted something that was a little more interesting. 


On that same note, I have been wanting to have more recipes from my cookbooks to add some variety.  I have convinced myself that it will be good to provide people with recipes that they can't quite as easily access for themselves, or haven't come upon before.  Thus, today I leafed through my many cookbooks and found a recipe for Dill Batter Loaf in Joy of Cooking.  It's ingredients were all those that I had already, or had in excess and wouldn't be able to use any other way.  For example, dill.  I got it through the farm share talked about last time and had had nothing to use it with, yet in this recipe it was described as being almost essential.  The only ingredient I was missing was large-curd cottage cheese, yet I had ricotta cheese in the fridge.  After leafing through the back of Joy of Cooking I found out that ricotta and cottage cheese are very similar, but for moisture content, which had been my assumption to begin with.  I just added a little more milk and away we went. 


The bread is positively wonderful.  It is very airy and light and tastes primarily of dill.  I cut down the salt a bit, but not too much, as we often have bread with salted butter and really salty bread is pretty terrible to begin with.  I would say this was a good choice, as the bread was good as I made it, so you may wish to do the same.  The recipe is below:


Dill Batter Loaf
Joy of Cooking 75th Anniversary Edition

One 9 by 5 inch loaf
This is an updated version of the Dill Batter Loaf that has been a long time Joy favorite.  (Referring to how my edition is the 75th anniversary edition, so some updates and additions have been made).  Fresh dill can now be found year-round at most supermarkets and is much preferred to dried dill or dill seeds.

Combine in a small bowl and let stand until the yeast is dissolved, about 5 minutes:

1/2 cup warm (105 to 115 degrees Farenheit)
1 package (2 1/4 teaspoons) active dry yeast

Combine in a large bowl or the bowl of a heavy-duty mixer:

3 cups bread flour (Used just all-purpose flour, which it says will be fine)
1/2 cup finely chopped onions
3 tablespoons chopped fresh dill, or 1 tablespoon dried dill or dill seeds
2 tablespoons sugar or honey
(1 tablespoon wheat germ, toasted) (Didn't bother adding)
1 teaspoon salt

Add the yeast along with:

1 cup large curd cottage cheese (Added 2 tablespoons less than a cup of ricotta cheese and replaced it with milk)
1 large egg

Mix by hand on low speed until the dough comes together, adding additional flour or warm water if needed.  Knead for about 10 minutes by hand or with the dough hook on low to medium speed until the dough is smooth and elastic.  Transfer to an oiled bowl and turn it once to coat with oil.  Cover loosely with plastic wrap and let it rise in a warm place (75 to 85 degrees Farenheit) until doubled in bulk, 1 to 1 1/2 hours.

Grease a 9 by 5 inch loaf pan.  Punch down the dough, form into a loaf, and place seam side down in the pan.  Cover with oiled plastic wrap and let rise in a warm place until doubled in bulk, about 1 hour.

Meanwhile, preheat the oven to 350 degrees Farenheit.  If desired brush the top of the loaf with:

1 egg, lightly beaten, or 1 tablespoon melted unsalted butter

Sprinkle lightly with:

1/2 teaspoon coarse salt or a few dill seeds

Bake until the crust is deep golden brown and the bottom of the loaf sounds hollow when tapped, 35 to 40 minutes.  Remove loaf from the pan to a rack and let cool completely.


Saturday, September 10, 2011

Butterscotch Pudding


Above are pictures of some of the vegetables we received from our friend's (Jeff and Kathy's) farm share while they have been away.

This morning I woke up with the idea that I was going to be working on my Daring Baker's challenge.  I did part of it, and then found out that my dad and brother were going to be heading down to Mount Desert Island to bike for the afternoon.  Not wanting to miss an opportunity to get exercise that involved something other than staring at the bottom of a pool for an hour, I heartily agreed to go.  Of course this meant that I wouldn't be finishing my Daring Baker's work until we got back.  Well, we went for the bike ride, came back, and I didn't really want to work on the challenge, for many reasons, to be discussed at a later date.


Anyways, I knew I just had to have something to post today, it being three days since my last post.  Then I stumbled upon a butterscotch pudding recipe on David Lebovitz's blog, which I just happened to have all of the ingredients for.  It was very easy to make, though a bit different from my normal pudding recipe, which calls for 5 egg yolks.  This one calls for just two eggs, which makes it fairly thin when done, and a very long chilling period to thicken it up a good bit.  The wonderful thing about this recipe is, because there are fewer eggs, the eggs are less likely to cook into little pieces in the pudding that must be strained out.  Actually, this pudding was perfectly lump-free when it got done. 

I really enjoyed this pudding, and I believe you probably will as well.  Its butterscotch flavor isn't maybe what you would expect; more like a nice brown sugar and butter flavor.  This is probably (actually I'm quite sure) because I used light brown sugar.  One thing I might add is that this pudding, after it is chilled just a few minutes, is good to be placed in a shallow bowl in the freezer for a while.  When it is partly frozen it tastes absolutely divine! The recipe is below:


Butterscotch Pudding
From davidlebovitz.com
4-6 servings
Adapted from Ripe For Dessert (HarperCollins)

4 tablespoons (60g) butter, salted or unsalted
1 cup (180g) packed dark brown or cassonade sugar (I used light brown, giving it a less pronounced, but still very good flavor)
3/4 teaspoon coarse sea salt
3 tablespoons cornstarch
2½ (625ml) cups whole milk
2 large eggs
2 teaspoons whiskey(I added a little rum, which was another recommendation given)
1 teaspoon vanilla extract

1. Melt the butter in a medium-sized saucepan. Add the dark brown sugar and salt, then stir until the sugar is well-moistened. Remove from heat.
2. In a small bowl, whisk together the cornstarch with about 1/4 cup (60ml) of the milk until smooth (there should be no visible pills of cornstarch), then whisk in the eggs.
3. Gradually pour the remaining milk into the melted brown sugar, whisking constantly, then whisk in the cornstarch mixture as well.
4. Return the pan to the heat and bring the mixture to a boil, whisking frequently. Once it begins to bubble, reduce the heat to a low simmer and continue to cook for one minute, whisking non-stop, until the pudding thickens to the consistency of hot fudge sauce.
5. Remove from heat and stir in the whiskey and vanilla. If slightly-curdled looking, blend as indicated above.
6. Pour into 4-6 serving glasses or custard cups and chill thoroughly, at least four hours, before serving.

Wednesday, September 7, 2011

Lentil Soup With Sausage and Kale


I didn't bother going to swim laps tonight.  There was too much to do!  Mostly, it was reading my economics textbook in order to make absolutely sure I knew what we are talking about in class.  Otherwise there was the long annotation for English and math homework, and of couse...this!  So not swimming, it's really not such a loss.

This weekend though, I am going to have to swim every day to make up for it, along with doing something else: I am going to do my very first Daring Baker's Challenge.  I will post the recipe and my results and pictures of course when I, as a participant, am allowed to at the end of the month.  It will be interesting, and should take up quite a bit of my day on Saturday, but I am looking forward to it very much.  This year, on the weekends, will be when I can get most of my baking done, as well as long cooking projects.


 Besides the Daring Baker's Challenge this weekend I also hope to make madeleines, because if I am going to have the name Madeleine's madeleines I ought to have a picture of madeleines.  We'll see if I can find one that fits the bill.  Maybe Julia Child?  I'm not sure if I have her recipe...  I do remember though that I once saw a recipe from an old French cookbook requiring lots of beating butter with a wooden spoon...maybe this?  It would be challenging! 

Anyways, today, just like last time, I made soup.  Soup is generally very difficult to mess up.  You mostly just have to be sure the ingredients don't 1) burn 2) turn to mush/uncooked 3) taste entirely unbalanced.  Most of these problems don't even occur when you are following the recipe to the T anyways, but who does that with soup?

I got the recipe for tonight's dinner from Rachel Ray, and it was surpisingly better than I expected.  It is very filling and though it states that it feeds four people, six is probably more accurate.  The thyme and rosemary are wonderful flavors in it.  There are many different textures, from the chewiness of the kale and the creaminess of the potatoes.  Some changes I did make were to use chicken sausage with casings, cut up into thin half-moons.  I had no fresh thyme or rosemary and just substituted dried of both.  I may have added more kale than necessary, because the recipe asks for "a bunch" of kale and though I had a bunch it seemed like quite a bit.  Anyways, it did cook down fine and seemed to be a good amount.  In short, you can use more kale than you think you need.  Also, (the list of changes seem endless) I didn't add a full half pound mushrooms because, well, I only had about 5 ounces.  I added them and it turned out perfectly fine, though I generally prefer more.  The recipe is below:


Lentil Soup with Sausage and Kale
Rachel Ray

Ingredients
1 tablespoon EVOO - Extra Virgin Olive Oil
1 pound bulk hot Italian sausage (Used chicken sausage with casings, probably less taste but still quite good)
1 cup lentils
1 medium onion, chopped
3 to 4 cloves of garlic, grated or chopped
1/2 pound cremini mushrooms, wiped clean and thinly sliced
1 baking potato, peeled and diced
2 sprigs rosemary, leaves removed and chopped  
3 to 4 sprigs thyme, leaves removed
Salt and ground black pepper
1/4 cup tomato paste
4 cups chicken stock
1 bunch kale, thick stems removed and discarded, leaves shredded

Yields: 4 servings
Preparation

Place a large soup pot over medium-high heat with one turn of the pan of EVOO, about 1 tablespoon. Once hot, add the sausage and sauté for 3-4 minutes, breaking it up into small pieces with the back of a spoon or a potato masher as it cooks and browns.
While the sausage is browning, pour the lentils out onto a light-colored plate and sift through them. Discard any small stones -- sometimes you find them sometimes you don't, but better safe than sorry.
To the browned sausage, add the onion, garlic, mushrooms, potato, rosemary, thyme, salt, pepper and the tomato paste. Cook, stirring frequently, for 3-4 minutes.
Add the stock and 2 cups of water, turn the heat up to high and bring up to a bubble. Add the lentils and the kale, stir until the kale wilts in then turn the heat down to medium and simmer 30-40 minutes, until the lentils are tender. Serve.

Monday, September 5, 2011

White Bean Dip, Summer Squash Soup with Mint Parsley Pistou, and Gluten-Free, Dairy-Free Popovers

Tomatoes from my grandmother's garden

Last night I had set my sights on making hummus today.  My lunches for a while have been devoted to wraps with hummus so I decided that today I might as well make it myself.  Turned out, as it always seems to, that we didn't actually have any chickpeas, or, for that amtter, any tahini.  So, that was out.  I almost gave up, but then I remembered that you can make something like hummus with cannellini beans, which I have an ample supply of.  Using a well-reviewed recipe from Giada de Laurentis, I was able to make white bean dip.  There was originally 1/3 cup of olive oil in the dip, which would have been way too much, seeing as 2 tablespoons made the dip taste enough like olive oil.  That though, is the only change that I made to the recipe.

Also today, I made summer-squash soup with parsley mint pistou.  The mint in the pistou pairs well with the squash soup, so don't try another herb.  The squash soup is a nice yellow-orange color and the contrast between the pistou and the squash is beautiful.

The popovers were pretty good, considering I had never had gluten-free popovers and had no idea what to expect.  They were a bit chewy, but that might have been because I had to stir them a bit more than I normally would have while I was waiting for the oven to become free.  As noted in the recipe, I couldn't really taste the chives I added, so I would definitely go with a strongly flavored herb as they suggest.  If you don't want herbs, they taste great with butter and raspberry jam!

We'll be back to school tomorrow, which is not something I look forward to returning to.  I have to say that I enjoyed being at home for Labor Day weekend, instead of going up to camp for the last time in the summer like we normally do.  We got to enjoy my grandmother's birthday, spend the night there, and go down to Prospect Harbor last night to go swimming in the ocean.  At least school is only four days.  Hopefully there will be no economics test on Friday!  All recipes, in order referred to, are below:

White Bean Dip
Giada de Laurentis

Recipe originally included how to make pita chips.  The link on the recipe name will bring you to the original with the pita chips.

1 (15-ounce) can cannellini beans, drained and rinsed
2 cloves garlic
2 tablespoons fresh lemon juice
1/3 cup olive oil (I just used 2 tablespoons for the dip)
1/4 cup (loosely packed) fresh Italian parsley leaves

Place the beans, garlic, lemon juice, 1/3 cup olive oil, and parsley in the work bowl of a food processor. Pulse until the mixture is coarsely chopped. Season with salt and pepper, to taste. Transfer the bean puree to a small bowl.

Gourmet, September 2006
For squash soup:
3/4 stick (6 tablespoons) unsalted butter, cut into pieces (Used 3 tablespoons olive oil instead, might just halve butter instead as soup tasted a bit too much like olive oil for my taste, though still good)
1 medium onion, halved lengthwise and thinly sliced crosswise
1/2 teaspoon salt
2 lb yellow summer squash, halved and thinly sliced
2 carrots, thinly sliced
1 yellow-fleshed potato (1/2 lb), peeled, halved,
4 cups chicken stock or reduced-sodium chicken broth

for pistou
3/4 cup loosely packed fresh mint leaves
1/2 cup loosely packed fresh flat-leaf parsley sprigs
1 large scallion, chopped (1/2 cup) (Used 1 shallot here instead)
1/4 cup extra-virgin olive oil (Didn't quite use the full amount here, seeing as was already in soup)
2 tablespoons water
1/4 teaspoon salt

Make soup:
Melt butter in a 6- to 8-quart wide heavy pot over moderate heat, then cook onion with salt, stirring, until softened, about 8 minutes. Add squash, carrots, potato, and stock and bring to a boil. Reduce heat, then simmer, partially covered, until vegetables are very tender, about 20 minutes. Remove from heat and cool soup, uncovered, 10 minutes.
Working in batches, purée; soup in a blender until smooth (use caution when blending hot liquids) and transfer to a bowl. Return puré to cleaned pot and thin with water if desired; simmer 3 minutes. Season with salt.
Make pistou while vegetables simmer:
Pulse mint, parsley, and scallion in a food processor until finely chopped. With motor running, add oil in a stream, then add water and salt, blending until incorporated.
Swirl 1 tablespoon pistou into each bowl of soup.


Crusty Herb Popovers
Living Without magazine, October/ November 2011

Makes 12 popovers

This recipe is a great substitution for bread at any meal and is easy and rewarding to make.  Adding fresh herbs compliments your thanksgiving menu.  For best results, do not replace eggs in this recipe.

4 eggs
1 cup milk or dairy free milk of choice (I used soy)
1/3 cup tapioca starch/flour
2/3 cup white rice flour
2 tablespoons fresh thyme, rosemary or sage, copped finely (I used chives, but couldn't taste)
Dash salt

1.  Preheat oven to 425 degrees.  Place a 12-cup muffin tin in the oven to preheat.  (A warm muffin tinhelps the batter rise.  Keep the tin in the oven until you're ready to pour in the batter.) 
2.  In a medium bowl, whisk together eggs and milk until well blended.  Add tapioca starch/flour, white rice flour, herbs and salt.  Whisk until combined and smooth.
3.  Carefully remove the hot baking tin from the oven.  Lightly grease it with cooking spray. 
4.  Pour in the batter, filling each muffin cup three-quarters full.  (Fill any empty muffin cups with water to ensure even baking.)
5.  Place popovers in preheated oven and bake 25 minutes or until popovers are puffed high and turn a rich, golden brown.  (For puffiest popovers do not open the oven door before 25 minutes.)  Serve immediately.


Saturday, September 3, 2011

Shepherd's Pie


It was nice to wake up this morning at nine-thirty, and not to hear the obnoxious beeping of an alarm clock.  I'm not sure how I am going to like having to readjust to that on Tuesday when school starts again.  In a way I am done with summer, but in a way I am also wishing I could enjoy the beginning of fall and all the nice weather it brings.  Maybe we should set up vacation in sections?  May and half of June could be vacation and August and half of September could be as well.  Outdoor classes could be held in between vacations...


This would also help by giving me time off during harvest time, so that I can reap the benefits of having all of this food.  But today, though there was no school, I didn't do anything with the plum tomatoes and squash we got from my grandparents.  That will be tomorrow, but today I made Shepherd's Pie, which even the boys like.  Squash soup with pistou, my parents were afraid, would not go over as well.


Anyways, this is not just any Shepherd's Pie, just as the Chicken Pot Pie was not any pot pie.  This is because, of course, the recipe is from the magazine, Cook's Country, which is a sister to Cook's Illustrated.  The recipe makes use of ingredients like beer, soy sauce, and tomato paste, many of which are in common with the chicken recipe too.  When I make the recipe though, I use gluten-free beer, ground turkey instead of beef, and gluten-free flour (this time tapioca starch) in replacement for the gluten flour.  The recipe is below:

Shepherd's Pie
Cook's Country, February/ March 2006

Serves 6 to 8

Although just about any mild beer will work in this recipe, we particularly enjoyed the sweet flavor of O'Doul's nonalchoholic amber.

Filling
2 tablespoons unsalted butter
1 large onion, chopped fine
2 medium carrots, peeled and chopped fine
2 pounds 85 percent lean ground beef
Salt and pepper
5 tablespoons all-purpose flour
1 tablespoon tomato paste
1/4 cup heavy cream
1 3/4 cups low-sodium chicken broth
3/4 cup beer(see note above)
2 tablespoons soy sauce
2 teaspoons minced fresh thyme
1 cup frozen peas

Topping
2 1/2 pounds russet potatoes, peeled and cut into 2-inch pieces
2 tablespoons unsalted butter, melted
1/3 cup heavy cream, warmed
Pepper
1 large egg, beaten (I don't use)

1.  For the filling:  Heat butter in large skillet over medium-high heat until foaming.  Add onion and carrots and cook until soft, about 8 minutes.  Add meat, 1/2 teaspoon salt, 1/2 teaspoon pepper and cook, breaking up meat into small peices with wooden spoon, until browned, about 12 minutes. Add flour and tomato paste and cook until paste begins to darken, about 1 minute.
2.  Add cream and cook until it spatters, about 1 minute.  Add broth, beer, soy sauce, and thyme anad simmer over medium  heat, stirring frequently, until mixture is thick but still saucy, 15 to 20 minutes.  Remove from heat, stir in peas, adjust seasonings, and transfer to broiler-safe 2-quart casserole dish.
3.  For the topping:  Adjust oven rack to upper-middle position and heat oven to 375 degrees.  Bring potatoes, 1/2 teaspoon salt, and water to boil in large saucepan over high heat.  Reduce heat to medium-low and simmer until tender, 15 to 20 minutes.  Drain potatoes, return to saucepan, and mash potatoes with butter and cream until smooth.  Season with salt and pepper.
4.. Spread potatoes over filling, using spatula to smooth top.  Brush with egg and drag fork accross top to make ridges.  Bake until filling is bubbling, about 15 minutes.  Turn on broiler and cook until top is golden brown, 3 to 5 minutes.  Remove from oven and cool ten minutes.  Serve.